Let’s Encrypt is a widely known service to provide SSL certificates. For some time now it has also been possible to obtain wildcard certificates. In this article I would like to show how to automate the creation of this type of certificate.
I use Certbot as the client to generate the certificates. For this purpose, there are different plugins for authentication that the domain actually belongs to the person who issues the certificate. This works for example directly with the Apache or Nginx plugin via the web server or via the Webroot.
Currently, this only works for certificates for one or more fixed domains, but not for wildcard domains. A wildcard domain is e.g. *.jonas-hellmann.de. The certificate is then valid for all subdomains of jonas-hellmann.de and I do not have to create a separate certificate for each subdomain.
Manual generation of wildcard certificates
To issue wildcard certificates, authentication via DNS is required. You can use the following command to do this:
sudo certbot certonly --manual -d *.jonas-hellmann.de -d jonas-hellmann.de --agree-tos --no-bootstrap --manual-public-ip-logging-ok --preferred-challenges dns-01 --server https://acme-v02.api.letsencrypt.org/directory
Two text DNS values are generated, for which – in this case – two TXT DNS entries must be created under _acme-challenge.jonas-hellmann.de. Of course, the domain must be changed accordingly. However, the creation and subsequent deletion of the DNS entries with the corresponding values is manual work and must be repeated at least every 90 days to renew the certificate. That is why I would now like to show how this can be automated!
Automatic generation of wildcard certificates
For this automation there are different DNS plugins from Certbot, which you can find here: List of Certbot DNS plugins. If the name server provider you use for your domain is not listed there, a relocation will be necessary. For example, I switched to the DNS service of Cloudflare.
To install the appropriate plugin under Debian 9, the following command was required:
sudo apt-get install python3-certbot-dns-cloudflare python3-cloudflare
Depending on the plugin the usage is a little bit different. For Cloudflare a file with the access data must be created, which must look like this:
# Cloudflare API credentials used by Certbot
dns_cloudflare_email = mail@example.com
dns_cloudflare_api_key = abcdefghijklmnopqrstuvwxyz
You can find the API key when you log into your Cloudflare account and visit the ‘My Profile’ page.
So that nobody else can see the data, you should change the access rights to 600. A corresponding warning is also displayed by Certbot.
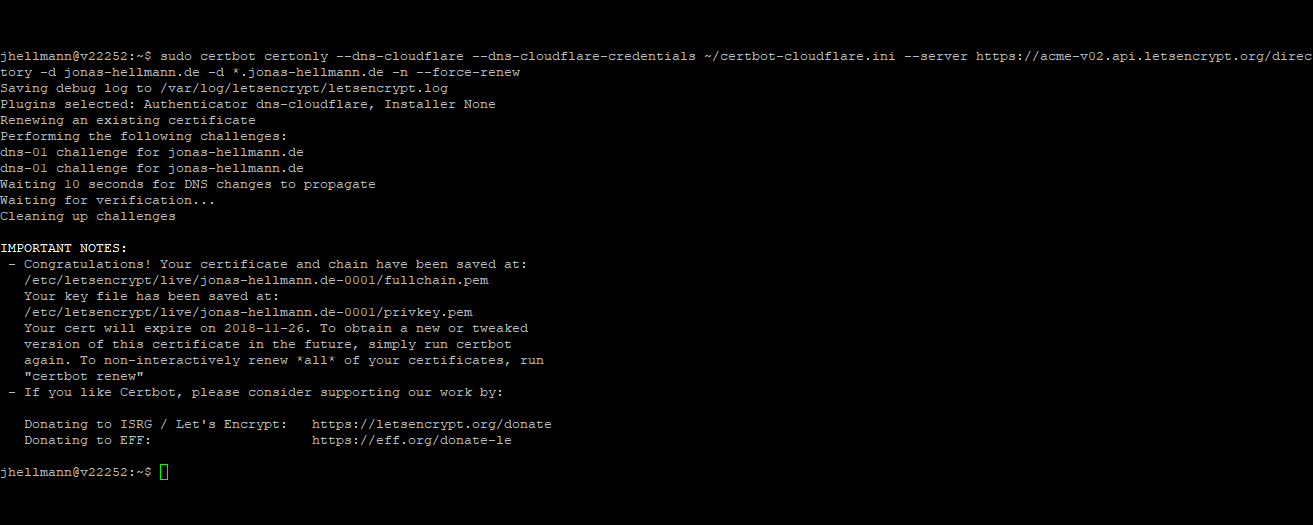
With the following command, the certificate can then be issued automatically without further interaction:
sudo certbot certonly --dns-cloudflare --dns-cloudflare-credentials ~/certbot-cloudflare.ini --server https://acme-v02.api.letsencrypt.org/directory -d jonas-hellmann.de -d *.jonas-hellmann.de -n
Don’t forget to replace the location of the file with the Cloudflare credentials.
For actual automation you can create a bash script that contains the above command:
#/bin/bash

sudo certbot certonly --dns-cloudflare --dns-cloudflare-credentials ~/certbot-cloudflare.ini --server https://acme-v02.api.letsencrypt.org/directory -d jonas-hellmann.de -d *.jonas-hellmann.de -n --force-renew
This script can be located in the home directory at ~/renew_certificates.sh. By the way, I added the parameter “–force-renew” at this point to make sure that the certificate will still be renewed even if it is not about to expire.
Since Let’s Encrypt’s certificates are valid for 90 days, you can set up a cronjob to execute this script on the first of each month. So you have a valid certificate and don’t have to worry about it anymore.

